My content design process
Here’s a high-level look at the process used to develop net new products on Microsoft’s Modern Work Customer Co-innovation team, and related deliverables for which I was responsible.
(Looking for more on how I think about content design? Check out this exercise.)
Phase 1: Ideation & Planning
Imagine together
The first element of a net-new project is defining and understanding: what do we want to build, and why? This really breaks down into business needs and user needs, and what we build is the sweet spot where those intersect.
- Business needs most often come pre-defined by the powers that be, but I consider it part of my role to ensure that I (and my team) not only fully understand the overlying strategy but also endorse it.
- User needs are identified through preliminary research and defined by creating personas that answer questions like “who are we building for?” and “what are they trying to accomplish?”
Preliminary user research tools
Finally, the team balances these requirements with development considerations and timeline to determine what we can build in the time allotted. This is our minimum viable product (MVP).
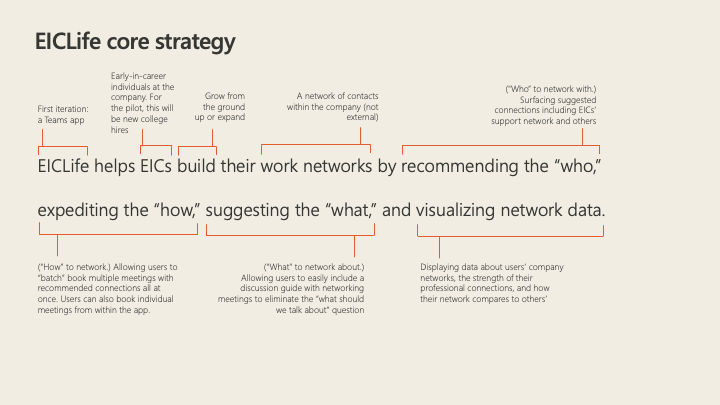
Define a content strategy
Out of this exploration, I develop a content strategy document that defines:
- what solution the team will build
- who
- we’re building it for and
- is doing the work
- where the solution will “live” and where users will access it
- when the user will need this solution in their overall journey
- how the solution will address the user (tone/voice) and
- why we’re building the solution (what we hope to accomplish)
Phase 2: Design & Create
Develop a user scenario
In small groups of 1-2 designers and a content designer (me!), we craft a “happy path” scenario describing someone using the product: a user journey. This is a high-level, written narrative that can be chunked into segments for each feature or surface of the product.
I deliver a final story document and a designer adds illustrative elements to help our partners easily understand the end-to-end scenario.

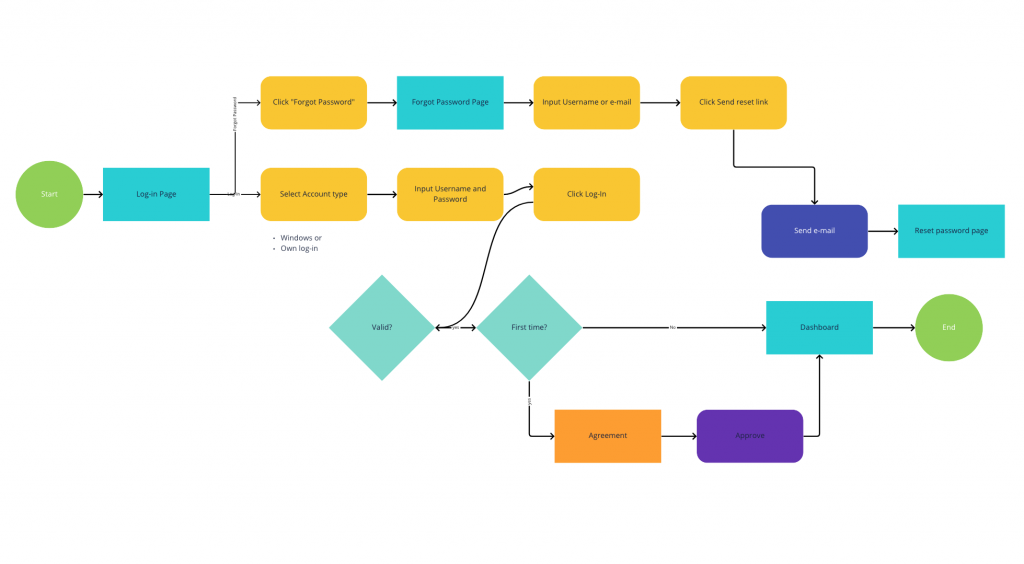
Translate scenario into user flow
The narrative user journey provides the basis to create a user flow in screens: first sketches and increasing in fidelity as we iterate.
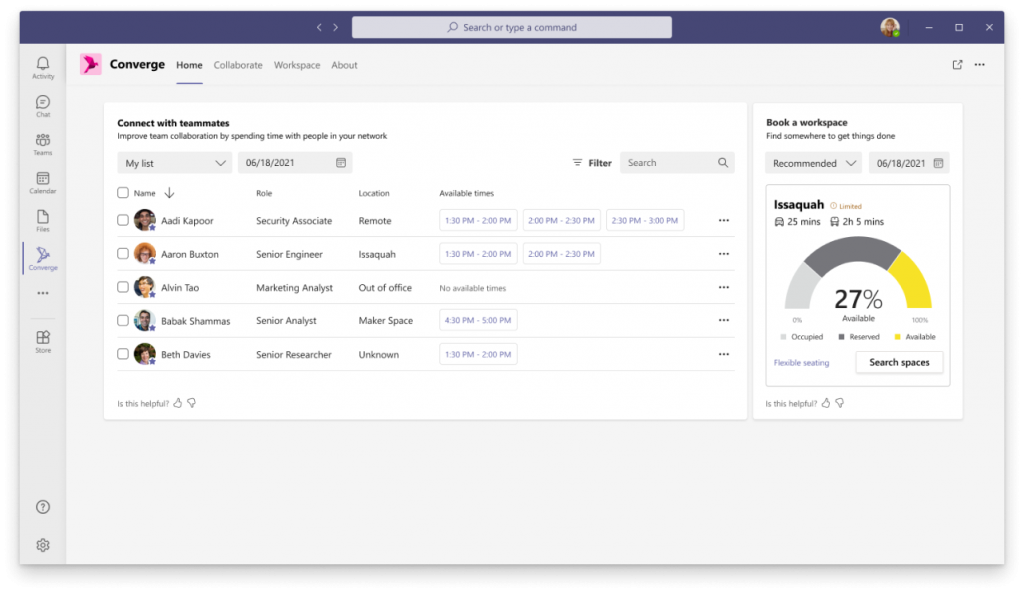
Craft copy for screens
Once the “happy path” user flow—no error states or edge cases, yet—has been created, each step becomes a screen. Due to the short turnaround time and limited scope of our co-innovation projects, I typically work with my design partners directly in the Figma file, which is the “source of truth” for copy and content, instead of trying to maintain a separate document or a spreadsheet for copy. We hand off a final Figma file to our developers and continually update that as we progress a little way ahead of them.
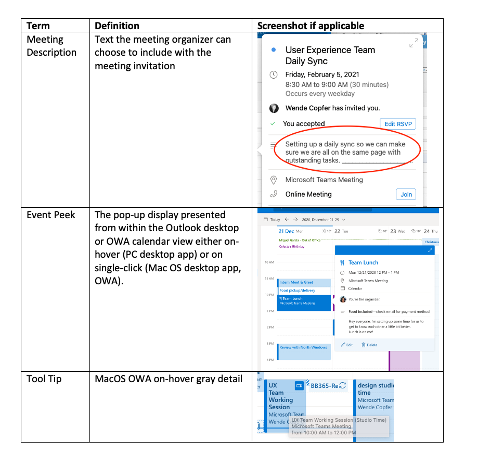
Keep the team on the same page
Any given project involves designers, developers, research, strategy, a product manager, and all our co-creators on the customer side of the team, and it’s critical to make sure everyone’s speaking the same language. I’ve seen hours wasted in meetings because people are talking about the same thing but using different terms, or vice versa.
For every project, I create a lexicon—a mini dictionary—of project-related terms. It’s a living document that grows throughout the life of the project. A ten-minute walkthrough of this document with the project team can save tons of time later, not to mention confusion and frustration. Read more about this process.
Phase 3: Build & Iterate
Get real with the build
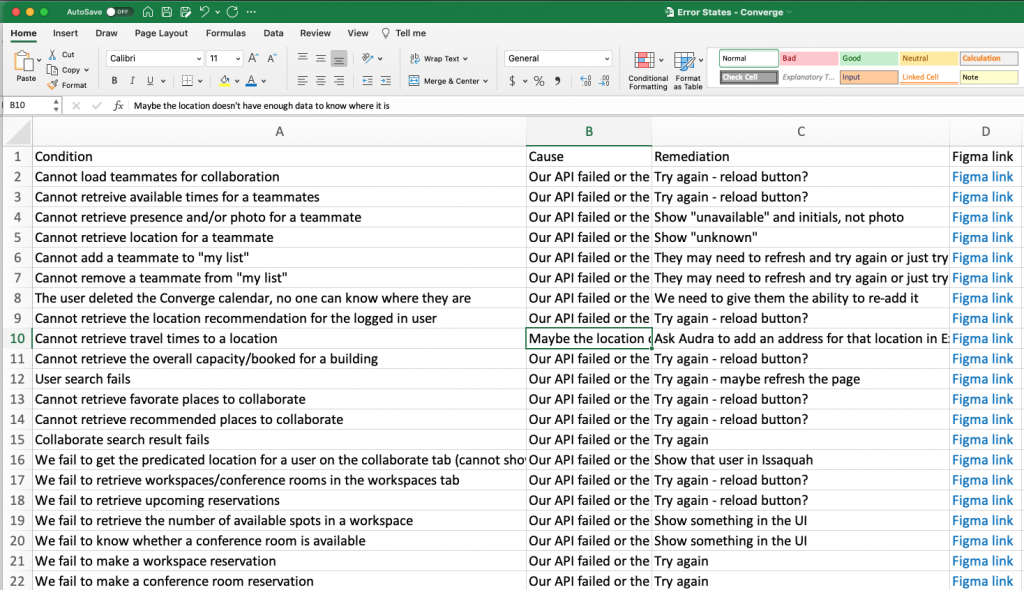
Once the engineering team begins to build the product it goes from imagination to reality, and myriad questions arise, most of them some version of “What happens when the user does this?” Designers begin work on offshoots from the “happy path” and I dig into error and alt-state messaging. There’s not time to create a design for each and every possible iteration, so these I write in a spreadsheet, usually attaching a unique ID to each message and including a link to the Figma where the template for each appearance can be found.
Pilot & test
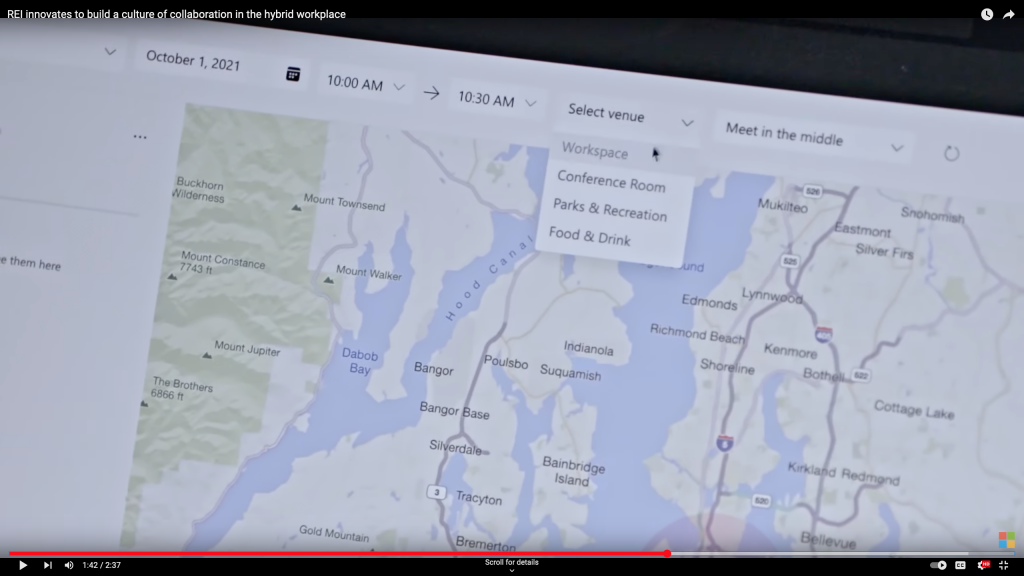
In our co-innovation environment, we don’t spend much time building. We get our MVP up and running within four to six weeks and then roll it out to pilot users, most often within the customer’s organization. (For example, check out the video about our project with REI on Microsoft’s YouTube channel.)
During the pilot, we can fix bugs and occasionally have room to implement small feature improvements, but for the most part the pilot is fast and furious, and we collect usage data along the way.
Document what we’ve learned
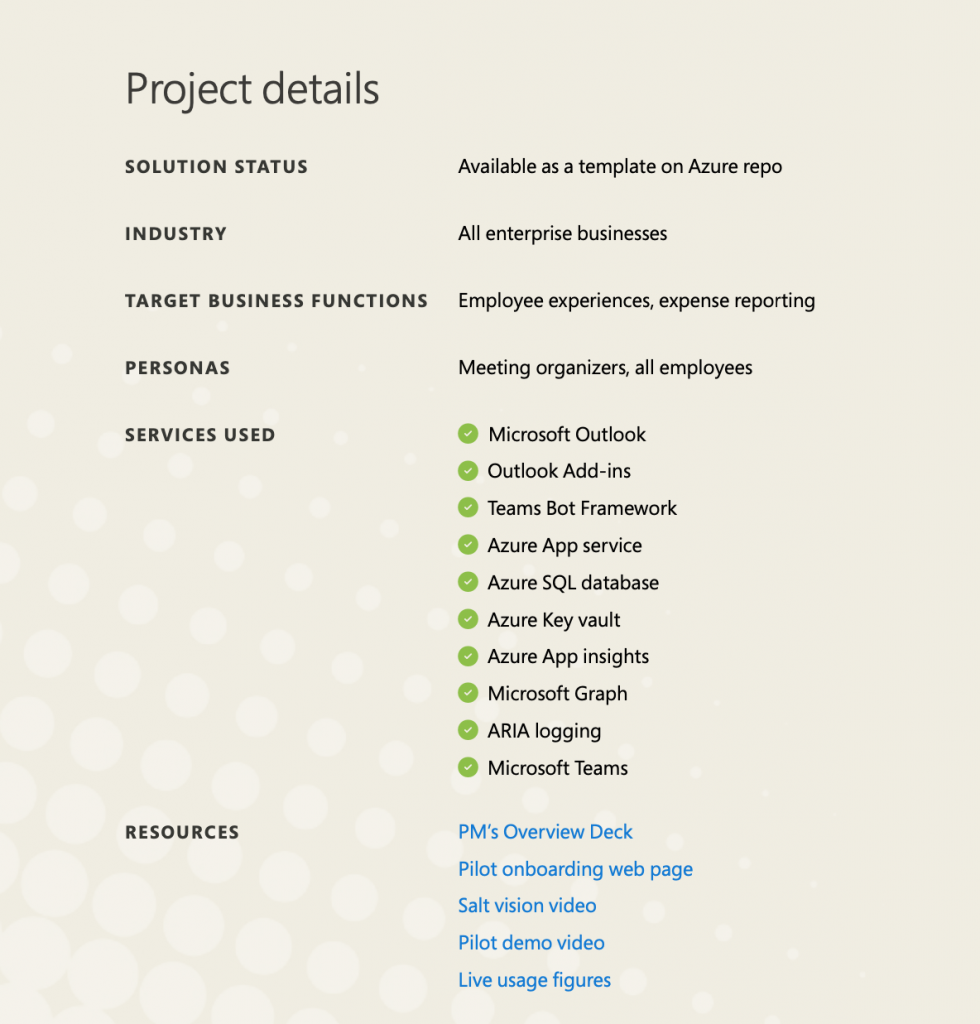
At the end of the pilot, our team conducts research with pilot participants, usually qualitative and quantitative survey responses and often some 1:1 interviews, too—everyone pitches in to help. When the results are in and the project postmortem is complete, I wrap everything up with a case study describing what we did and what we learned.
Then…do it all over again!
The MWCCI team typically worked on three or four projects at a time, and as the only content designer, I participated in all of them at their various phases.